

Happy day paper crafters. Today I have a project I’m excited to share – a fun St. Patty’s Day Banner!
I have a fun place in my foyer that I love to decorate for the different seasons and noticed that my St. Patty’s Day decor was a little blah. Isn’t it great when we can create our own?
You will notice that I’ve used all kinds of products on this St. Patty’s banner. I’ll have a full list of the supplies I’ve used at the bottom of this post. The biggest triumph I had while making this was just adding the layers and more layers. Grab your GLUE GUN… it’s going to make your life even sweeter. Let’s get started!
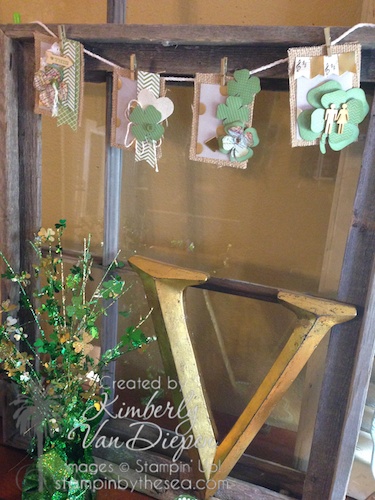
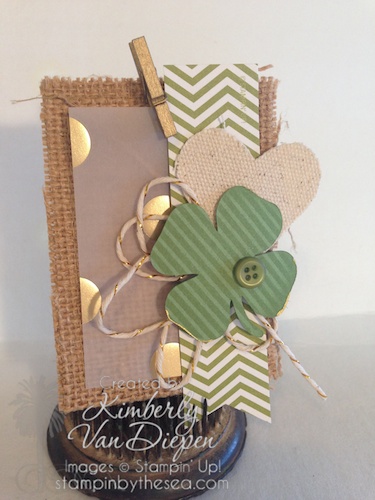
As you can see it’s just 4 simple panels. I started with pre-made burlap pieces I found at a local craft store. These are pretty small panels, just 2.5 x 3.5.

After spending a good hour looking for a St. Patty’s day stamp set I finally came to the conclusion I was going to have to jump into My Digital Studio for a little help. Remember, My Digital Studio is NOT just for scrapbookers. The gazillion images in the program CAN be printed. Even better you can export the SVG image from My Digital Studio and import into your e-Cutter. I wanted some shamrocks. Oh boy did I get them. I had plenty of images to choose from in My Digital Studio. This shamrock came from the Luck O’ The Irish download. 
I cut my shamrocks in all different sizes using Wild Wasabi cardstock. I also decided to get crazy and used a vintage map I bought awhile back and cut a shamrock from that as well. I loved that little added vintage look.
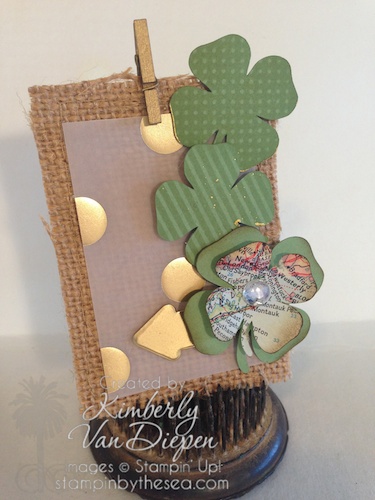
Now each burlap panel had a piece of the Fancy Foil Designer Vellum over it. To keep this in place I added a few dollops from my hot glue gun. You want to pay attention that the glue will not be seen so if I could strategically place the glue under a gold pokie dot it was perfect. You can barely see my arrow peeking out at the bottom but this was easy peasy using my On Film Framelit Dies and the Gold Foil paper.

Using Wild Wasabi ink I stamped all of my shamrocks using images from an older Paper Pumpkin and the newest paper pumpkin for February. OH BOY I love when I get more milage on a stamp set. I also used the World Map Background stamp set on the BIG shamrock. Perfect match to go with my vintage map shamrocks. YIPPIE!!!
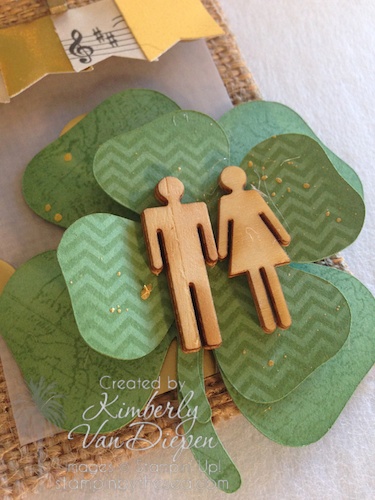
Now is when I get a little GIDDY about the itty bitty banner at the top of this panel. I used our Sale a Bration BANNER punch. (ummm… FREE with $50 purchase—-> Just saying’)
Remember me telling you about my cool vintage music sheets I found awhile back? I decided to use them for the itty bitty banner at the top along with our Gold Foil Sheet. Oh my GEE! It’s super cutely. I attached this using my glue gun at the top of the Designer Vellum. It’s not going anywhere. Love that!! I can’t forget my little wooden Mr & Mrs. Van Deep in Troubles. These little wooden pieces make my heart beat faster. I want MORE of them. They were included in a Paper Pumpkin kit a few months back and I have a tight grip on my extra ones that were in my kit.
You may be wondering where all that Gold Splatter is coming from? Well…. I hoarded a few bottles of the Smooch Pearlized Accent Ink that we use to sell. I LOVE this stuff and with gold being SO trendy I can’t help but use it all the time. You may even notice I gently placed a little bit of the Gold Smooch around the shamrocks. Sometimes it’s great to be a craft hoarder. Do you have a coveted product that we no longer sell that you keep right next to you? I would love to hear what it is.
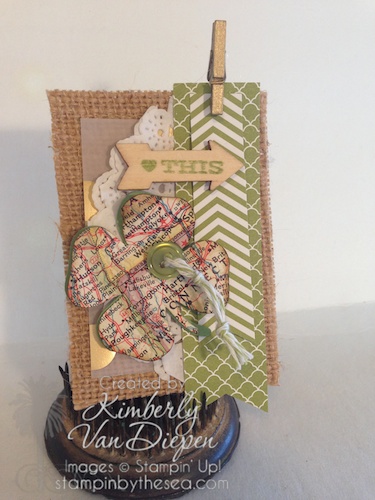
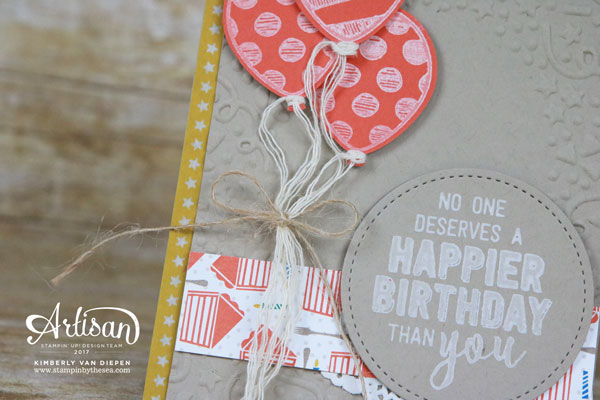
This next panel was all about layering fun things. Starting with the Designer Vellum and adding a doily. I used my Subtles Color Collection Designer Series Pack (Pear Pizzaz) and created a banner using my Hexagon punch.
I love the Essentials Wooden Elements and that you can alter them to suit your needs. I simply stamped the image using the Hip Notes stamp set using Wild Wasabi ink.
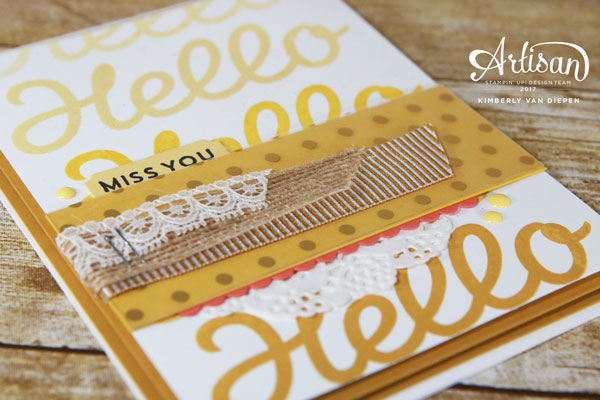
This last panel I used my Designer Paper again and added a coil of the beautiful Gold Bakers Twine. To get this coil the way I wanted it… (THAT NEVER HAPPENED) I used my glue gun. I’m not sure how some crafters get that coil to look so pretty. I’m going to practice more. The canvas heart comes from the Heartfelt Banner Kit from that you can get FREE with a $50 purchase. It’s another one of our fun Sale-a-Bration items.

There you have it. A small little St. Patty’s Day banner to brighten my foyer area hanging from a vintage frame. I love how it turned out and it was not an all day project. I just kept layering fun things.
Also, I’m still creating a few more things for St. Patty’s Day and to add to my foyer display. I found these great celtic fonts below on Pinterest. Click the picture and start creating with these.

If you are a font-a-holic you can find a board on my Pinterest page with tons of free fonts. 
There are many great things you can use to make fun St. Patty’s day crafts. Don’t forget to check out the fun digital downloads Stampin’ Up! has to make your creating a bit easier. Are you looking for JUST our e-Cutter digital downloads? Click HERE to see all that you can import into your machine.
Supplies
Stamps: Hip Notes #133504, Paper Pumpkin Images Ink: Wild Wasabi Cardstock:Wild Wasabi
Accessories: Gold Bakers Twine #132975, Paper Doilies, Gold Foil Sheet #132622, Silhouette Cameo, My Digital Studio, Essential Wooden Elements #132258, Glue Gun, On Film Framelits Dies #132969, Fancy Foil Designer Vellum #133363, Banner Punch (Sale a bration), Heartfelt Banner Kit (Sale a bration), Mini Metallic Clothespins #133320, Soft Subtles Designer Buttons #130030
Shop Online to find all your crafting needs! Click HERE and start shopping!
New Digital Downloads & weekly deals TODAY!
Keep posted on all my latest creativity, craziness and tips & tricks by following me on Instagram, Facebook , Twitter and Pinterest.
Just click the links on the top left of my blog.
Create something beautiful today!!


4 thoughts on “St. Patty’s Day Banner”
Love your old frame (gotta find one for my house!) and the garland is fabulous – how fun to make something so wonderful- – great inspiration! Too bad SU! does not give us more fun for this Holiday…..TFS!
Love all the great layers – the gold touches just set things off.
Thanks Wendie!!
Antique shopping Carol. It’s my absolute favorite thing to do and you can find these old window frames for pretty cheap. They just need to be cleaned up good. 🙂
Comments are closed.