

WOWSA!
Two posts back to back… I'm almost scared to say I'm back on track because every time I do something cray cray happens.
Thinking positive & moving forward….
To get myself in the swing of things again I've been working on a few Halloween projects to brighten up my Halloween decor in my house. Each year I love to make a banner. Stampin' Up! made that MUCH easier this year with the Halloween Banner Simply Created Accessory kit.
I decided to make my banner from a vintage burlap coffee bag. I was very hesitant making that first cut because I LOVE this bag, but I new this would make a fun Halloween banner.
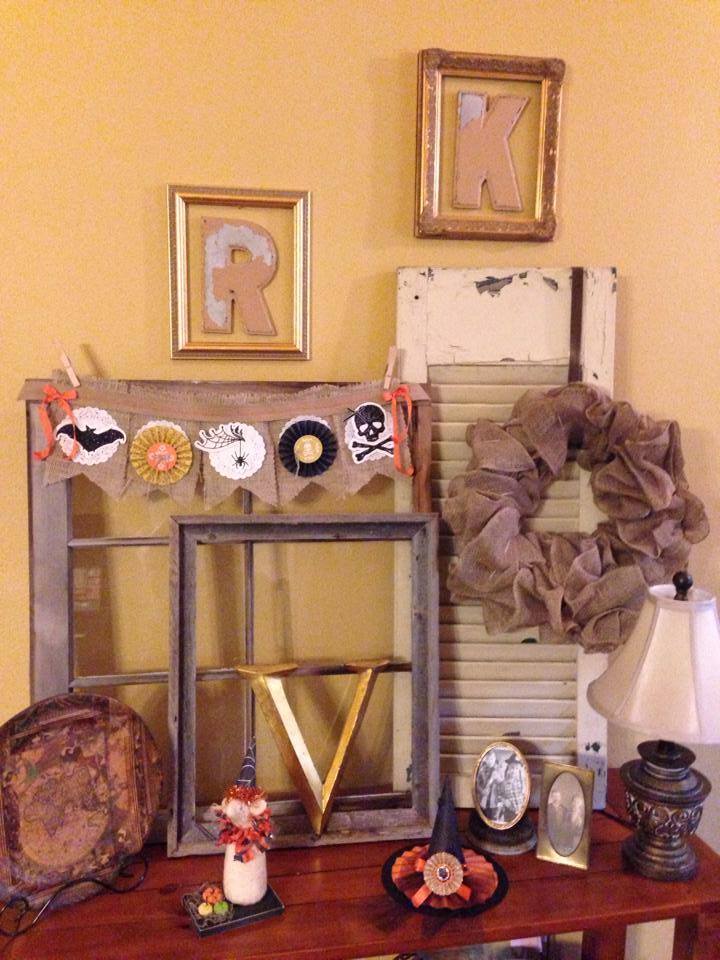

This banner kit is perfect for a DIY Halloween project to make by yourself or with friends. I used almost every piece in the kit and added the simple Paper Doilies. To keep everything in place I used a a glue gun.
Once the entire banner was complete I sewed our new Burlap ribbon across the banner pieces using Orange thread in a zig zag stitch. Really simple but I love how using the vintage burlap coordinated with my vintage theme around the window panes.
I was in love with this set up until I had seen another project that I had to create.
This next project takes a bit more time… BUT… it's so worth it.
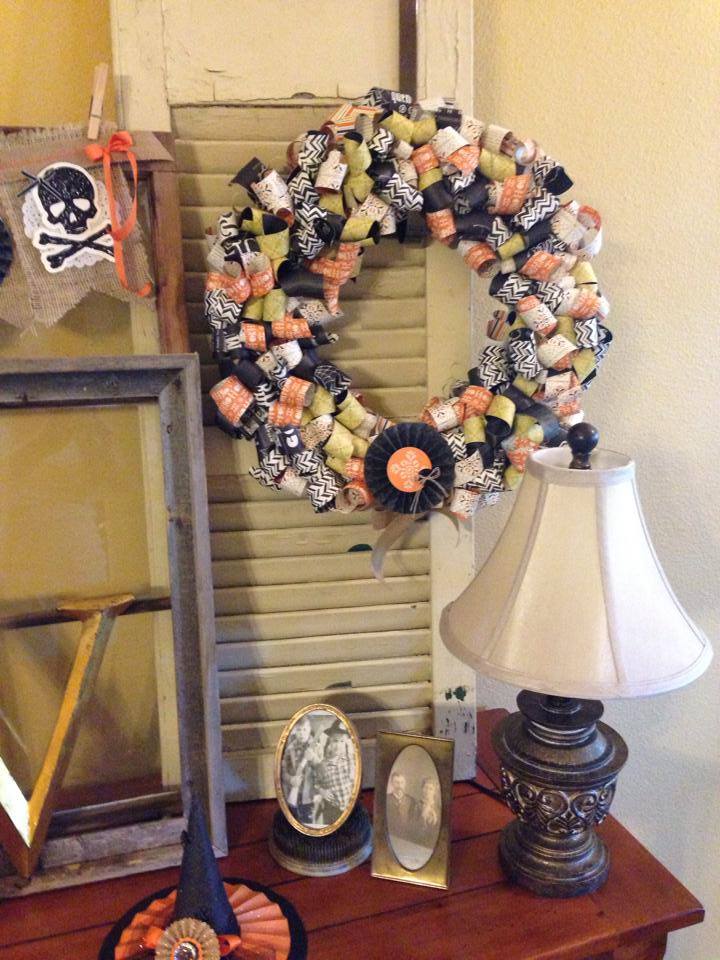
I'm not sure what the official name of this ca-ute wreath is but we will call it…. Very Ca-ute paper wreath.
Not only does this project provide a great way to use Designer Series Paper, it also was a great use of my left over pieces I had from the banner kit.
To create this wreath:
1. Cut 1 x 12" strips from 6 pieces of Designer Series Paper. (I used 7 because I wanted mine a little thicker.)
2. Once all of your strips are cut fold each one in half.
3. Using a bone folder curl each of the ends.
4. Once your strips are curled adhere each of the pieces to a Styrofoam wreath using stick pins.
5. Make sure that all of the Styrofoam is covered.
If you have followed me for any length of time you know I'm a huge Halloween fan when it comes to creating. Each year I love to create new Halloween Ornaments for my tree. Guess what I will be creating tomorrow?? Squeal!
You can see the supplies I used for this project below.
Supplies Used (Both Projects)
Accessories: Burlap ribbon #132140, Tea Doily #129399, Halloween Banner Simply Created Accessory kit #132698, Glue Gun, Burlap Bag, Linen Thread, Witches Brew DSP #132185
Exciting New Items…
*Make sure to check out my NEW & IMPROVED Online Store today after 10am MT. My favorite NEW feature is your cart is SAVED incase you had a chore to do and need to come back. WOWSA!!
*If you have ever considered beoming a demonstrator don't let this great special pass you by. Become a part of the best paper crafting communities. Click HERE to read more information.
Connect with ME!
Facebook– I share, uplift, inspire, and create… It's ALL fun!
Instagram– Let's connect! My FAV Social Network!!
Pinterest– inspiration pinner-load! I'm a late night pinner…
Twitter– You never know what I'm going to say!
XOXOXO


6 thoughts on “Don’t Faint!”
whoot! great projects … dare we ask if a video is in the near future?! lol! glad you are back! 🙂
So jealous that you went to Luckett's!!! Could you clarify ~ what size is each strip that you are pinning to the wreath? Is is 1 x 12 folded in half? What size styrofoam wreath did you use? Thanks for sharing!
Love your decor Kimberly.That banner is awesome. I saw that wreath and thought oh my how cute. I'm going to make one for my mom but for Christmas. 🙂 So glad to see you creating again. YAY 🙂
I am still sitting up and soooooo enjoying your projects! I love your antique/vintage ideas….they fit everywhere….cutting up that old bag must have been hard but you are so wonderfully clever…no fear for what you would do to make something wonderful! Glad things are getting more settled and you can get back to doing what you love more often…lucky us!
Allison, the paper strips are 1 x 12″. Just cut them and then fold in half. Curl each side. Then pin to your wreath. 🙂
thanks Kimberly!!! LOVE it!
Comments are closed.