

Valentines + Ornament + Fringe= Love
You know that moment when you have an idea and you get so excited you don’t know where to start? This project fits that description to a tee.
Cathy and I have always created fun Valentines ornaments but this time we were a bit stumped. I had purchased a ton of these cute bubble ornaments to create something during Christmas but completely ran out of time. Can you relate?
We decided to put them to use. The fun part about this project was having not only Cathy here creating but my mom as well. It was a collaborative effort of 3 brains. That’s a whole lotta creative power right there! WOWSA!
Gather Your Supplies & Create It!
When creating this little valentine ornament keep in mind there are tons of possibilities to make it happen.
A Few Products Needed:
Bubble Ornament- found at your local craft store.
2 Tea Lace Doilies
Coaster Board
Whisper White Cardstock
Natural or White Filter Paper
Hot Glue Gun
You will see other products in the product list below.
Getting Started
To start you will need Coaster Board, 2 Doilies and Filter Paper. These products can be found in my online store HERE.
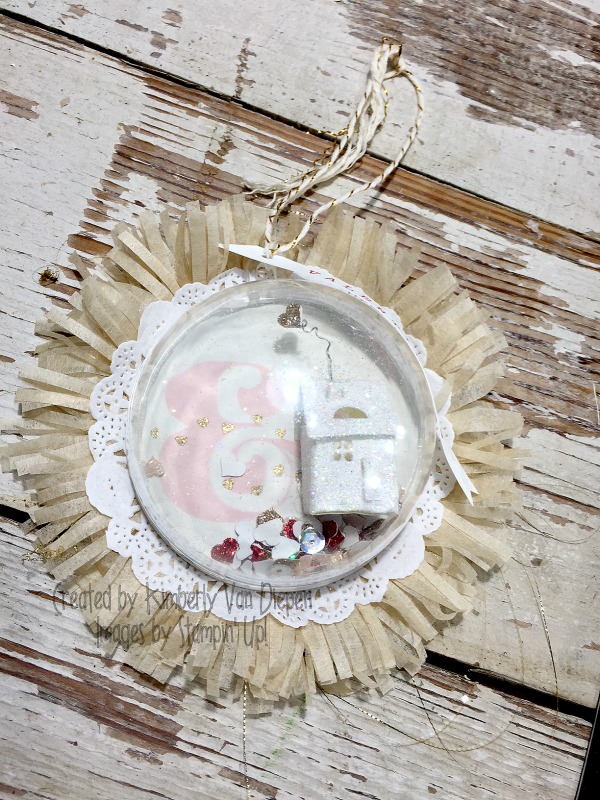
Measure your bubble ornament back to see what size circle you will need to die cut your coaster board. I used the Circle Framelits from Stampin’ Up! and it cut through the coaster board beautifully. You will also need the same size circle from a piece of Whisper White cardstock.
I stamped my images using the You Plus Me stamp set and Pink Pirouette Classic Ink. You will notice just a PoP of Gold on the heart image. I loved how this stands out.
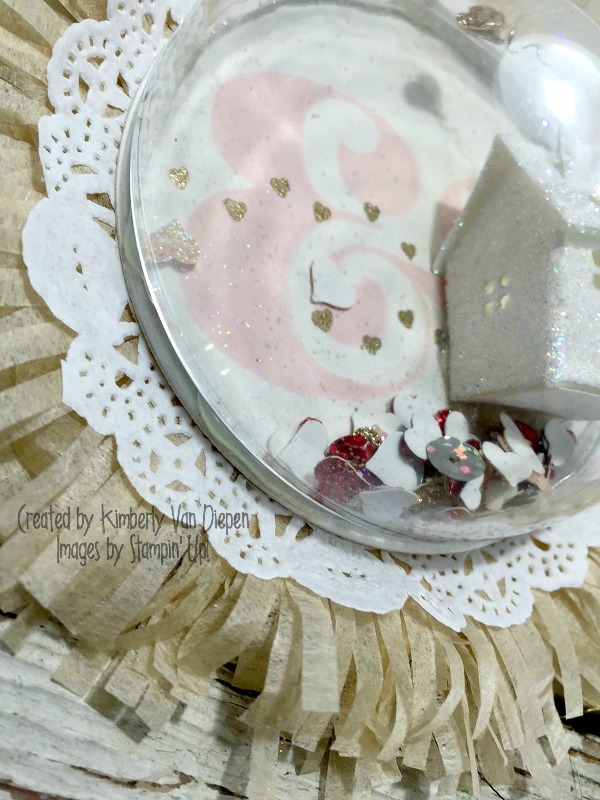
The cute little house is from Papertrey Ink. Cathy had this die and it was a gem to use inside our ornament. Once it was die cut we used VersaMark and Iridescent Ice on the house and heat embossed it. You could also create stacked hearts, or create a little house all on your own. Endless possibilities.
The very fine detail was using a little bit of wire and having it come out the chimney with a heart attached. The Confetti Heart Border Punch was perfect for creating the confetti inside the bubble as well as using one of them to attach to the wire. We also added fun sequins for a little extra shaker power.
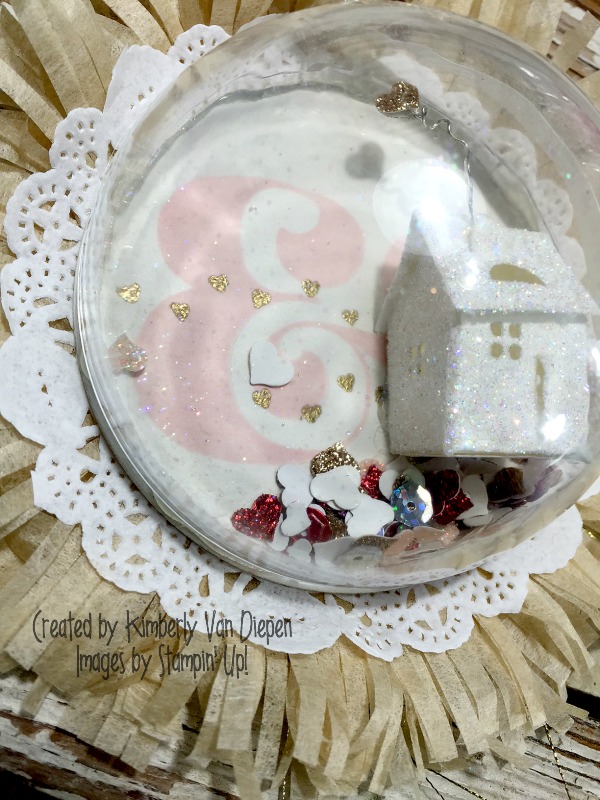
To keep all the pretties inside the ornament we sealed the back of the ornament using Coaster Board. I simply used my Circle Framelits and measured the back of the Ornament to create the exact size in the coaster board. Hot glue is perfect to attach the coaster board to the ornament. I also added a Tea Lace Doily.

My favorite part was adding the fringe. You will need the Fringe Scissors (really a must have) to create this awesome look. Simply take a piece of filter paper and cut at 3 x 12. Fold this in half. Now Fringe the open end of the Filter Paper. You will wrap around the back of the ornament using Sticky Strip or Hot glue to keep in place. To make the fringe thicker and more fluffy, add another layer of fringe. You won’t be disappointed.
You can see in the photo above that once the Fringe is added you will put another Tea Lace Doily and Coaster Board over the Fringe. This will complete the project.
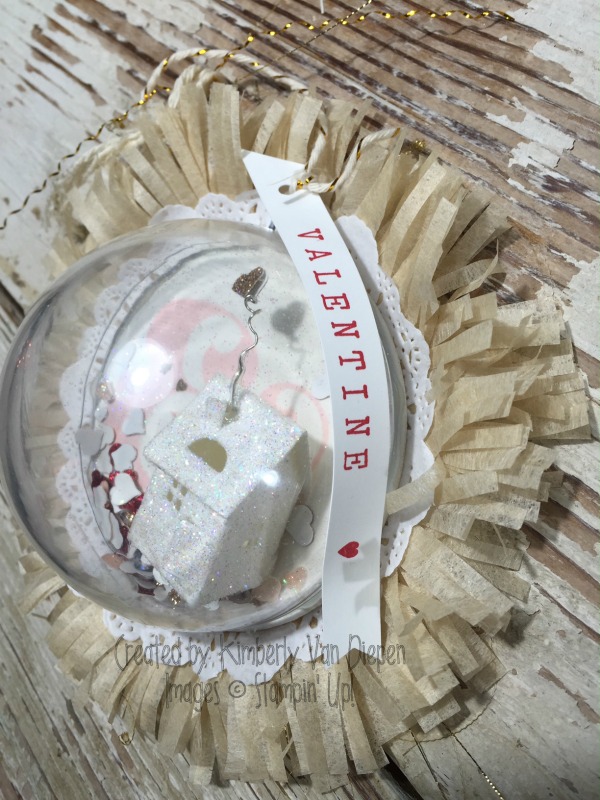
Don’t forget the little Valentine banner. It’s created with my new favorite stampin’ tool. The Alphabet Rotary Stamp! Remember, I used it on my card in yesterday’s post to spell “Coffee.” See it HERE.
You might be asking…. What is the pretty gold threads you are seeing coming from the fringe???
It’s a tedious job but a fun one. Those little Gold threads were taken from Gold ribbon. We peeled that ribbon apart to the bare bones and once we had the Gold threads we curled them a bit with snips like you would to ribbon on a package. SO FUN!!
Are you ready to create your own Valentine Ornament?
Things to remember….
It’s Sale-a-Bration! Spend $50 and receive your choice of a free Sale-a-Bration item. This year the Sale-a-Bration products are AMAZING.
I’m off to create. I have an idea and I better get it out of my brain before it slips away….
XOXOXOXO


9 thoughts on “Valentines + Fringe= Love”
OMG I love love LOOOOVE this ornament!!! I’m so going to have to try to make one!!! swoon!!!!
So glad you’re back. I have missed your blog post.
Nancy, thank you. XOXOXO
LOL, You made my day… It’s the fringe… SO purty!
WOW that is absolutely gorgeous. Glad to see you creating again and glad that everything is well.
All your projects are beautiful! They always are though. Just wondering if you have any hints on using the rotary stamp? I too have had it for awhile-I usually don’t get such a neat straight line.
Terry, I’ll share a video on it. That might help. Then it will be your best friend again. LOL. XO
Thank you Kimberly, you are the best. Love your blog! (& your designs) Continued prayers for Russ & continued progress for him.
Thank you Kimberly, you are the best. Love your blog! (& your designs) Continued prayers for Russ & progress for him.
Comments are closed.